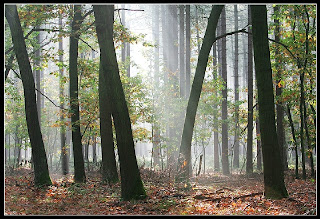
 The best and most complicated drawing I've made so far is this landscape. The whole thing started with my old friend Mr. Crilley and his video about artist's block in witch as a background he's completing some work project. Said background is a manga style forest with some very cool looking trees. After seeing them I decided - forest it is! So I consulted my good friend Google, found a picture I liked and started on it. I used this as a reference for the composition and placement of the trees, however, as you can see, in this photo the light source is behind the treeline making the trees themselves look like silhouettes. So I decided to switch the light direction to the opposite (behind the onlooker) and draw the trees in some detail. I decided to use Mark Crilley's style for the trees themselves. I stated with a basic outline for the main 3 trees then put the bigger background ones and finally decided to outline some grass and the ground in general.
However what I discovered was that I, apparently, can't draw manga style grass. This proved to be a big problem. I had to find some other way to draw grass. As simple as grass might be in real life, for a drawing, it can be a pain in the butt. It certainly was one for me. After looking it up on the internet, I came across this very useful tutorial and decided to go the semi realistic way. After drawing the basic tree trunk shapes I went in and did some detailing - in this case it was simple lines randomly placed to represent the texture of the bark. I made the lines darker and more closely spaced as I went from foreground to background trees. Lastly I added the small saplings and the leaves. Here came second big hurdle I needed to overcome for this piece. For me the difficult pat in drawing trees are the leaves. I found an easy to follow technique on youtube. The original video is an amazing landscape tutorial that I want to try someday in the future. In this landscape there are a few trees as small background details drawn using a stile I've never tried before, however the part where he shows how to make leaves is very easy to understand and follow. As you can see I managed to go from a total tree disaster in my A Wall of Inspiration post to a pretty decent job in the drawing on this page. What the video didn't mention but I found out trough trial and error is that one should be careful with the placement of the leaves - you have to leave small random spaces in between the squiggly bits then put some light line work there to act as the small branches. This way the tree has a more natural feeling to it.
 So what do I do now? Well after watching the tutorial video for the leaves I decided that some well placed eraser marks would do the trick. Now this is the place where I have to say that having a good eraser with a sharp edge to get into small spaces is a great idea and investment. I unfortunately did not have one of those. Erasing just the right bits without destroying all of the previous work was tricky to say the least. After some careful erasing I managed to create a decent highlight fading nicely into the darker shadows. To finsih everything off I put a few lines for bark texture as I did in the beginning.
In the end what I had was my best work so far, a believable looking forest with some semi-realistic, if slightly drunk looking, trees. Using some basic research and the knowledge of others I managed to have visible improvement in a week. So this is my wisdom for the day - use whomever you can get your hands on to. Every problem that you may encounter while drawing , someone else already has seen it, thought about it
and probably solved it as well. Be smart with your time, be resourceful and be the best that you can.


No comments:
Post a Comment